To position your hedge into its new surroundings, follow our step-by-step guide to ensure a successful installation and establishment.
An important part of choosing the right hedge is understanding the limitations of your chosen location.
These can include:
All of these restrictions can be overcome by choosing the right species or mix of species in your hedge, by some initial preparation and subsequent inputs during planting and aftercare. As each site and situation will be unique we suggest you speak with your landscaper or our nursery manager before making that final decision.
Good soil preparation beforehand will give your hedge the best start in life.
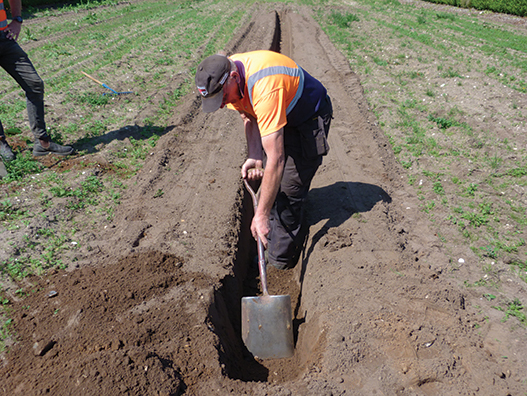
Prepare the ground by digging out a continuous trench which should be a minimum of 60cm wide and no more than 40cm deep and 50cm longer than your finished hedge length ideally.
When digging out the trench keep the top soil and subsoil separate as you do not want to backfill the plants with the subsoil. If using subsoil to backfill add in a good quality compost and thoroughly aerate before use.
Remove all weeds and old roots from the trench to allow for good root growth.
Loosen the bottom and sides of the trench to make it less compact for the roots to penetrate and easier to get established. This is particularly important in heavy soils.
Add in a good quality compost to the soil you are backfilling the hedge with.
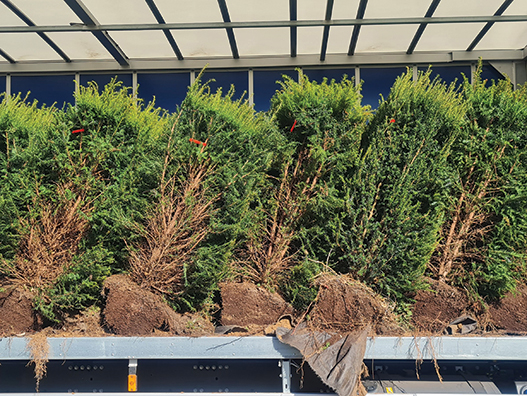
Your hedge will usually be delivered in 2.4 metre lengths each of which will be sequentially labelled. Your delivery charge includes a waiting time of one hour whilst you unload which in most cases should be more than adequate to complete.
We strongly suggest that you have a telehandler or similar available as each section weighs at least 240kg and should never be lifted by hand.
Each hedge section should be lifted using 3 soft strops. Strop both ends of the section with the third strop in the middle just above root level. The hedge has been grown in such a way as to ensure the roots do not come apart if they are lifted in this way. Some bowing of the rooting section is normal however.
If strops are not available to unload, you can always pull your hedge into position across your telehandler forks and manoeuvre into position.
Storing delivered hedge sections should be avoided. We strongly recommend that the hedge is planted immediately upon delivery. This minimises handling and therefore risk of damage or further stress to the hedge.
In dry weather and following long delivery journeys we suggest the hedge roots are well watered before planting.

It is always best to have the depth of the trench just slightly shallower than the depth of the root ball, as this will allow for natural drainage and settling in the soil.
If you are adding a rooting compound do so now. If you are using an underground irrigation system or anchoring system, this should be installed now.
Remove the growing membrane if it is still present.
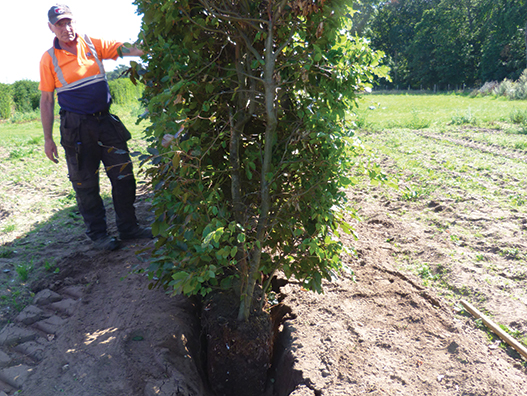
The hedge sections should be manoeuvred into place following the sequential numbering on the label. The labelled end goes against the previously planted section of hedge. This will ensure the hedge ‘knits’ back together (see later).
Lower the hedge’s roots into the planting trench, so the top of the root is approximately 5cm above the existing ground level.
Once all sections of hedge are in place backfill them lightly to allow straightening up of the hedge.
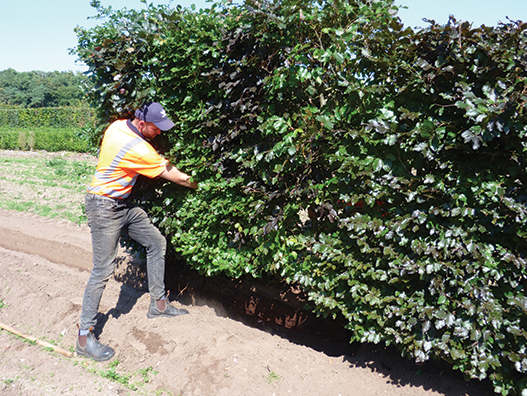
Check that the hedge is straight and symmetrical and that the ends of each section are ‘knitted’ back together and then firm down the soil around the root to ensure it is secure and no air pockets exist around the root. Remember to use the clean top soil and compost, not the subsoil.
We suggest that a layer of mulch is added now. This will help keep the hedge free from competing weeds and will help retain moisture around the roots. A mulch layer should be 5-8cm deep to retain the moisture, but leave a small ring around the stems.
Give your hedge a good watering now.
With hedging, it is good practice to very lightly clip them after planting, as long as extreme weather conditions, such as frost/snow or hot/direct sun are not forecast. This will give them an even line for growth and will encourage the hedge to bud out well in the spring.
Aftercare is extremely important; follow these steps to ensure good establishment;

Get in touch to discuss any requirements

Last year, Boughton donated a substantial 3 tonnes of...
>
Boughton – the UK’s leading natural growing media supplier...
>Part of The Bennie Group
A family of great companies

